Showing posts with label PAINTINGS. Show all posts

Wednesday, 1 May 2019

How to paint Terracotta Plate with Madhubani Design


Hey guys, Welcome to DIY Craftopedia. I'm Sanathan and this channel is all about pottery, Pot painting and many more such crafts. For the first time, I tried working on a terracotta Plate. I found this plate while shopping for vases and decided to try it out.
With just slight practice with paint brush, you can create stunning madhubani patterns. You may need a circular template or protractor for this project.

Sunday, 28 May 2017

Marble Painting on Glass Bowls

Swirl Painting on Glassware

Transform boring looking ordinary glassware into stunning swirly painted artworks.


Making A Swan Pot using White M-Seal

Making a Swan Pot

Swirl Painting on Pot - Abstract Designs

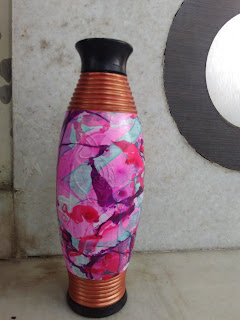
Marble Painting on Pot

Materials


  • A White painted pot.
  • Nail polish/any Enamel paints. (your favorite colors)
  • A Tub full of water.
  • Tape (Optional)
  • Metallic paint (your favorite color)
  • Brushes.

Instructions

  1. Pour the nail paints on the surface of water in the tub.
  2. Blow over the surface to create stunning patterns.
  3. Roll the pot on the surface to transfer the design onto the pot.
  4. Let it dry
  5. Finish the project with metallic paints.


Procedure (Video)


Monday, 9 May 2016

Different Types of DIY Fabric Painting Ideas

Fabric Painting 

Painting you dull fabrics and transforming them into the master piece is an art of appreciation. Learn this awesome hobby without much effort and money at "Craftopedia"!

Tie and Dye Technique

  • Wet the fabric and squeeze the excess water
  • Tie the fabric with tie cords/ Rubber bands at required areas using different kinds of ties such as beads, coins or grains.
  • Paint the untied area with thick coats using desired shades of fabric colours with applicator brush.
  • Allow to dry for 24 hours and then untie the cords. 
  • Iron the reverse side to fix colour on the fabric. 
This technique of tying  and dyeing helps to create Fabulous patterns on a plain fabric. 


Blending Technique 

  • Dampen the fabric.
  • Dilute the fabric colour with water.
  • With light strokes or dots apply two or more diluted colours on the fabric.
  • Allow the colours to blend with each other.
  • Dry for 24 hours.

Stenciling Techniques

  • Position the stencil design on the fabric holding it firmly with adhesive tape.
  • Prepare fabric colour in a pallet with a little water. Dip your brush in the fabric paint. Dab excess paint from the brush and stipple or apply on the fabric. 
  • use different colour combinations and shades by applying different colours in different areas of the stencil.
  • Remove the stencil to see the overlay full effect.
  • Let dry for 24 hours.


Stenciling allows you to reproduce a pattern or a design as many times as you like. 


Block printing Technique 

  • Draw a design such as a flower on the raw surface of a potato. Carve out the design. You can also choose vegetables and fruit having textured surface when cut (eg; lady finger, onions, pineapple etc). Leaves having interested shapes can also be used as block.
  • Hold the fabric in the place with adhesive place.
  • Apply a thick coat of fabric colour on the block with brush or sponge.
  • Place the block carefully on the fabric and press in firmly.
  • Lift the block without sliding or tilting.
  • repeat the procedure using different colour combination and different types of blocks.
  • Dry for 24 hours. 


Share if you liked this article - 

Friday, 15 April 2016

Acrylic Painting - Basic Strokes and a Landscape - Sunset

Learn the Basics of Acrylic Painting

Acrylic paint is a fast-drying paint made of pigment suspended in acrylic polymer emulsion. Acrylic paints are water-soluble, but become water-resistant when dry. Depending on how much the paint is diluted with water, or modified with acrylic gels, media, or pastes, the finished acrylic painting can resemble a watercolor or an oil painting, or have its own unique characteristics not attainable with other media.

You need - 
  • A Paper
  • Acrylic Paints
  • A Flat Brush (Preferably Synthetic)
  • A Round Brush 
  • A Plate
  • A bowl of water
  • Piece of Cloth

Basics of Acrylic Painting - 


Landscape Painting - 


Learn the Innovative Way to Decorate a Mirror - Mirror Painting

Mirror Painting 

You need - 
  • A Mirror
  • Glass paints
  • Glass Liner.
  • Some Creativity ..........
Procedure - Follow this Video -


Thursday, 14 April 2016

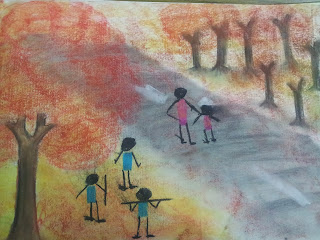
Soft pastel Painting - Landscape - Beach

Learn How to use Soft Pastels for Making a Landscape Painting - Beach

Learn the art of Soft Pastel Work by Making a Simple painting of a Beach.  

You need - 

  • A Paper
  • Soft Pastel Pack (I would recommend 'Camel soft pastels' for beginners).
  • A Pencil
  • A Piece of Cloth (for Smudging.)

Procedure - follow this video and create your own master piece.


Soft Pastel Painting - Basic Colour Blending - A Raven on a Stem

Learn the Basics of Soft Pastel Painting with Techniques on How to Blend Colours

Image result for soft pastel camlinSoft pastels This is the most widely used form of pastel. The sticks have a higher portion of pigment and less binder, resulting in brighter colors. The drawing can be readily smudged and blended, but it results in a higher proportion of dust. Finished drawings made with soft pastels require protecting, either framing under glass or spraying with a fixative to prevent smudging; hairspray also works, although caution should be taken, as fixatives may affect the color or texture of the drawing.White chalk may be used as a filler in producing pale and bright hues with greater luminosity.


You need - 

  • A Pack of Soft Pastels. (Preferably of Camel company)
  • A Paper
  • A Cloth
  • Pencil

Procedure - 

Thursday, 7 April 2016

DIY How to make an Embossed Painting - Paper Mache - Chalk Powder

How to Make an Embossed Painting on Cloth using Paper Mache and Chalk Powder.

Importance of Paper Mache 

Paper Mache is strips of paper or fabric that is ripped up, dipped in a glue mixture (water and glue mix, water and flour, or ceramic/chalk powder mix), then applied around a form. The forms could be anything, balloons, wires that give a general shape. Another method is to soak paper in water for 48 hours and grinding it in a grinder. Then, it could be mixed with glue and used as clay for moulding.

The strips are applied in several layers so that the whole structure is sturdy and stable. In some cases, the inner form is removed before completion or the whole thing is created in pieces, removed from the form, and then put together with more layers. This is so it is as light as possible. Then it's sanded, painted.

Paper Mache came about as an easy, cheap, and lightweight solution to make objects. It's not a new thing; the Russians used it to make boxes, trays, jewellery, etc., in the 1700's. People may look on it as pretty rudimentary or as just a kid's craft project now, but artists, both now and in history, that have worked with it have produced some really amazing pieces. It could also be called as an eco-friendly craft work as it reduces and recycles a large amount of paper waste. In many cases, it could be replaced with plastics (Home decor, bowels, packing material, etc) which further reduce the problem with plastics. Nowadays it is also used for making embossed paintings. This is a tutorial on how to make one such painting. 

This is one such Embossed painting which I have made with paper mache and Chalk powder.


You Need - 

Paper mache
 - Chalk powder/Ceramic Powder
- Acrylic paints
- Cloth 
- Brushes
- 2-3 Bowels
- Sponge

How to make Paper Mache for this Project -

Tear some newspaper into small pieces and soak them in water for an entire 24 hrs. Then, grind the soaked papers in mixie or grinder. Then mix 500 gm of chalk/ceramic powder in 3 cups of paper mache. After adding the powder, mix it with hands to get a dough like this -

Then follow these Steps -

  1.  Take a cotton cloth and cut it in a shape required
  2. Fix it on a hard board using tweezers.
  3.  Mould the paper clay into the design required and paste it on the cloth.
  4. Cover the entire background with chalk/ceramic paste using hands and sponge to give a good texture.
  5. Leave it for 2-3 days to dry.
  6. After drying, Paint it with acrylic colors.

Follow this Video for further assistance 


Thanks for viewing
Any questions ? you are free to comment below.


Sunday, 27 March 2016

How to Get Glass Painting Effect on OHP sheets


How to Paint on OHP Sheets (Glass Paintings)


I know that buying a glass and painting it is not economical, safe and easy. So I'am presenting this technique of painting on OHP sheets.


Things you need -

  • OHP Sheets ( Plastics sheets )
  • Glass paints (of Camel company)
  • A Design of your choice. 


Procedure -

  1. Make a Design of required object.
  2. Place an OHP sheet on it.
  3. Trace the Design on the OHP sheet using the glass liner (available in the glass color packet)
  4. Let it dry
  5. Then color the design with your creativity and imagination.

Here is a video describing the Process -


Saturday, 26 March 2016

Embossed Ceramic Painting

Embossed Ceramic Painting 

This Video teaches you how to create a Embossed Painting using Ceramic powder. You need - 
  • Ceramic powder
  • Cardboard base
  • Glue
  • Mixing bowel
  • Paints
  • Brushed
  • Touchwood or Varnish (Optional).


How to make Trees for Dioramas | Artificial Trees for Architectural Mode...

Hello Craftopedians! Wire Trees Wire Trees made of Wool As the Title suggests, this is an Architecture Student Hack video...