Wednesday, 13 June 2018

Growing Mango Tree in a Pot from Seed | Introduction


HELLO PEOPLE! Welcome to DIY Craftopedia. Few weeks ago (almost 15-20 days ago), I planted a mango seed in my Pot. I wasn't expecting much but today, I saw the Sapling which is almost 1 week old. So, I decided to make a real-time blog entry and growth process of it. Starting with a brief introduction about the 'king of fruits' - Mangoes!

Mangifera indica, commonly known as mango, is a species of flowering plant.
It is native to the Indian subcontinent where it is indigenous. Hundreds of cultivated varieties have been introduced to other warm regions of the world. It is a large fruit-tree, capable of a growing to a height and crown width of about 100 feet.
The species domestication is attributed to India around 2000 BC. Mango was brought to East Asia around 400-500 BCE. The species was assessed and first named in botanical nomenclature in 1753. Mango is the national fruit of India, Pakistan and the Philippines.


How did I Plant it?

I did not even knew at the time of planting that the seed must be broken open to reveal the actual seed for faster germination. So probably, it took longer time for my plant's germination. But still it happened. Let me give a brief account of the atmosphere here at Hyderabad, India.
It's June, so its still hot but we have received a lot of pre-monsoon showers. The Temperature here is more than 30 degrees Celsius during daytime and 25 degrees Celsius by midnight. Humidity is around 50% - 60%. And, its really sunny most of the time.


Here are pictures of my plant on 14th June 2018


The Mango Sapling presently has 6 healthy leaves. And 3 upcoming leaves. I will keep posting updates every now and then. 

Tuesday, 12 June 2018

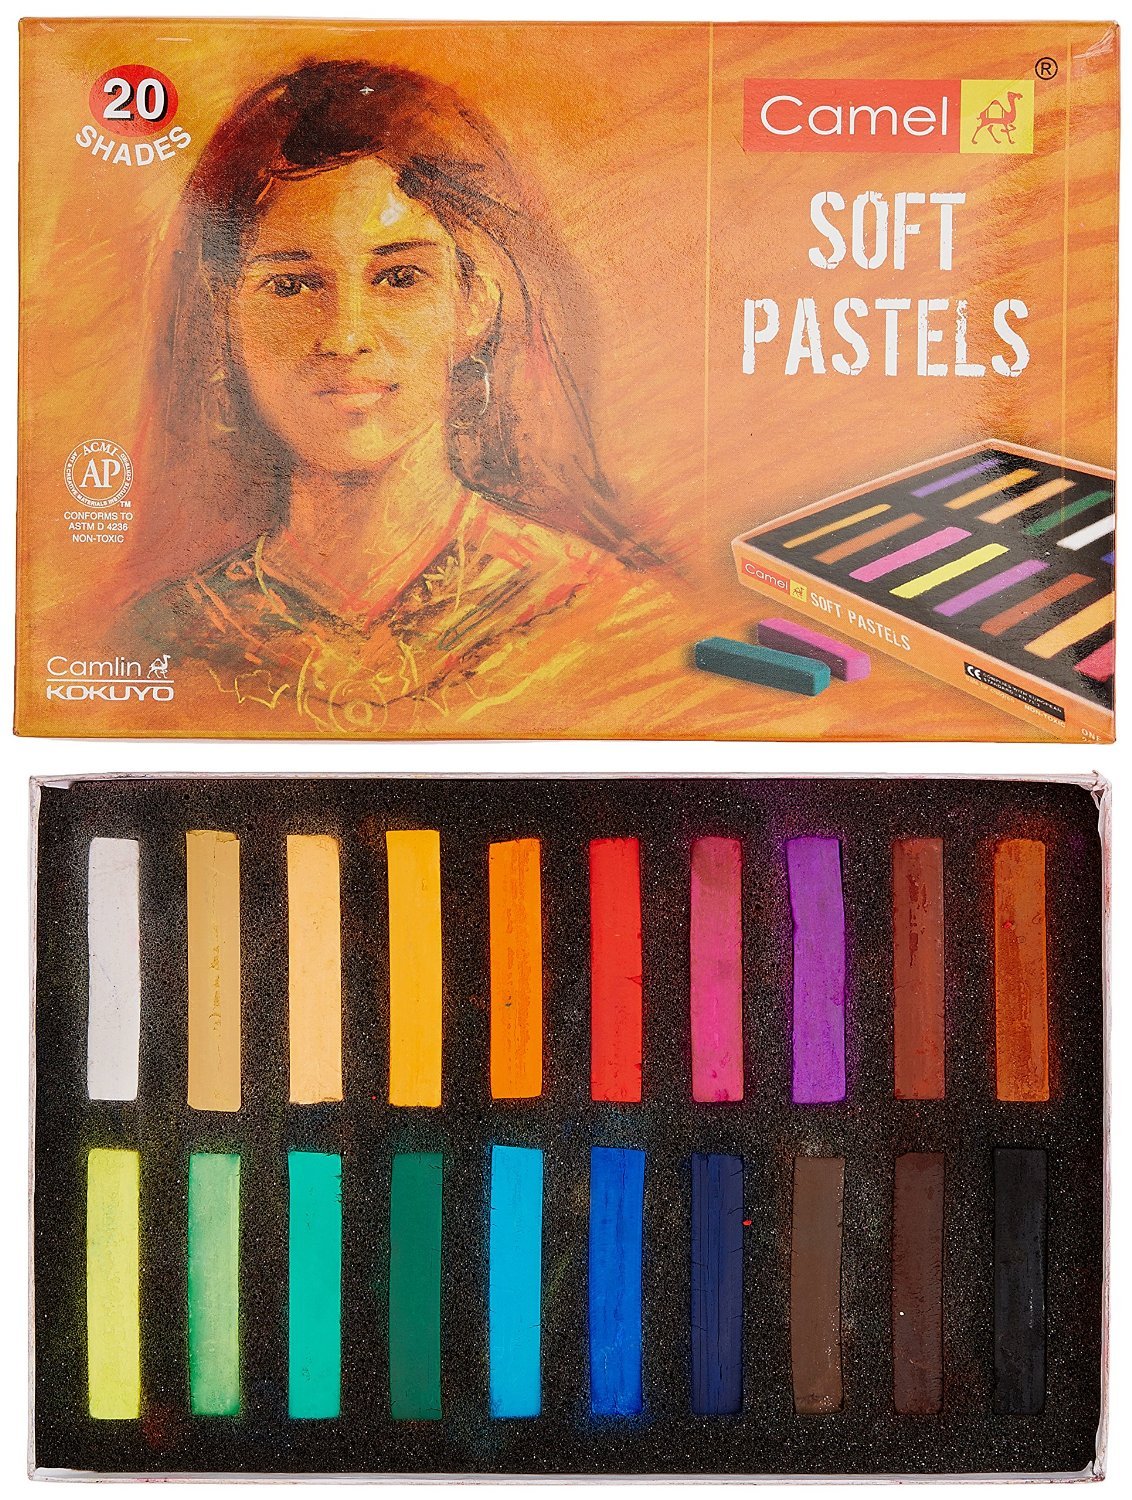
Learn to use Soft Pastels - Basic Techniques on Soft Pastel Works - The Lonely Bird

About Pastels - 
Pastel sticks or crayons consist of pure powdered pigment combined with a binder. The exact composition and characteristics of an individual pastel stick depends on the type of pastel and the type and amount of binder used. It also varies by individual manufacturer.
Image result for soft pastels.

Dry pastel media can be subdivided as follows:


  • Soft pastels: This is the most widely used form of pastel. The sticks have a higher portion of pigment and less binder, resulting in brighter colors. The drawing can be readily smudged and blended, but it results in a higher proportion of dust. Finished drawings made with soft pastels require protecting, either framing under glass or spraying with a fixative to prevent smudging; hairspray also works, although caution should be taken, as fixatives may affect the color or texture of the drawing. White chalk may be used as a filler in producing pale and bright hues with greater luminosity.


  • Pan pastels: These are formulated with a minimum of binder in flat compacts and applied with special Soft micro pore sponge tools. No liquid is involved. A 21st-century invention, pan pastels can be used for the entire painting or in combination with soft and hard sticks.


  • Hard pastels: These have a higher portion of binder and less pigment, producing a sharp drawing material that is useful for fine details. These can be used with other pastels for drawing outlines and adding accents. 

Hard pastels are traditionally used to create the preliminary sketching out of a composition. However, the colors are less brilliant and are available in a restricted range in contrast to soft pastels.


  • Pastel pencils: These are pencils with a pastel lead. They are useful for adding fine details.

In addition, pastels using a different approach to manufacture have been developed:


  • Oil pastels: These have a soft, buttery consistency and intense colors. They are dense and fill the grain of paper and are slightly more difficult to blend than soft pastels, but do not require a fixative. They may be spread across the work surface by thinning with turpentine.


Materials required -

  • Soft pastels
  • Drawing sheet
  • Soft Clean Cloth (for smudging)
  • Small sheet of paper (for hand rest)
  • Pencils
  • Earbuds (for detailing)

Procedural Video -

(image source: google.co.in)

Saturday, 9 June 2018

Make a Cool Gemstone Candle for Yourself - Follow these Simple Steps!


Welcome back to DIY CRAFTOPEDIA - Crafts For Home Decor!


Another candle making video is ready (this happens to be my personal favorite.) A Gemstone effect Candle.


The uniqueness of this idea is that the entire candle has an abstract ragged look. I have chosen the shades of blue and indigo for this candle. 

Materials Needed -

- Wax - Mould - Wick - Crayons - Double Boiler (or any two vessels) - Ice-cube tray - Knife/Cutter
Procedure -
  • Melt Wax in a Double boiler.
  • Add your favorite color to it. (Just put a few pieces of crayon in it)
  • Pour the molten wax in Ice-cube trays.
  • Leave them for few hours to solidify.
  • Remove the blocks of wax from the tray and cut them into 1/2 inch (or less) size pieces.
  • Prepare the mould by attaching the wick.
  • Fill the mould with these pieces.
  • Melt some more wax (without any colour)
  • Pour the molten wax in the mould (filling the gaps and crevices between the wax pieces).
  • Leave it overnight to solidify.
  • Pull out the candle from the mould. (If it gets stuck, Submerge the candle in Boiling water for 2-3 minutes and then try to pull it).
Here is the Procedural Video -


My other Candle Videos - The Best (and safe) Wax Melting Technique - https://www.youtube.com/watch?v=OmHFf... Making a Designer Tower Candle - https://www.youtube.com/watch?v=TTXtW... My complete Candle Making Videos Collection - https://www.youtube.com/watch?v=EMj-x...

Friday, 8 June 2018

How to make an Ice Cream Sticks Candle Shade | Popsicle Stick Art


Hello People, Welcome to DIY Craftopedia.


We have done many candles in the last posts. Hence, we need a candle shade for them. Isn't it? Ice cream Sticks seems to be the perfect material. For this awesome looking candle stand, all you need are Popsicle Sticks (Ice Cream Sticks) and Glue (I would have preferred Hot Glue Gun, if it didn't produce so much of glue strands!)


Procedure - 

  1. Join four Sticks to form a Square.
  2. Make as many squares as possible with the Popsicle sticks supply you have.
  3. Attach one square on the other having a sight twist in the placement as shown - 

     4. Continue attaching the half of your Frames with increasing angle.

     5. Stack the remaining half of your frames on top of each other without twisting (simply straight as shown)

   
       6. Attach both the spiral half and straight half where the straight half goes at the bottom and spiral comes up.

       7. Leave it to dry. Then light a candle inside.


Procedural Video - 


Monday, 4 June 2018

Create your own Stunning Irregular Candles without ANY MOULD !!!


Are you bored of making simple pillar or votive candles? I'm! 
Cannot find any silicon moulds nearby? Then this post is for you. 


Materials-
- Wax - Candle colours (Crayons) - Ice Cubes Tray - Vessels (for melting wax) - Spoon - Candle Wick - Needle/Screw Driver
- Double Boiler


Procedural Video -


Saturday, 2 June 2018

Candle Making - Cotton Candy Candle Making Tutorial


Hi Guys, Welcome back to Crafts For Home Decor.

I LOVE Candle making. And this technique is one of its kind to make a textured candle. The cloudy look of the candle where the colors blend softly gives it a cotton feel.
Materials -
- Wax - Candle Mould - Candle Wick - Two vessels - Induction Cooker/ Double Boiler - Spoon - Wet cloth - Wax Crayons (For colors)

Procedure -

  • Melt some wax in a double boiler.
  • After the wax melts, remove it from the heat source and start stirring it with a spoon until it forms a creamy texture.
  • Ready the mould by attaching the wick to it.
  • Take spoonfuls of wax and pour it in the mould.
  • Tap the mould once or twice to remove any air bubbles.
  • Add other layer of different coloured wax to the mould in the same way.
  • Leave it overnight to solidify.
  • Then, slowly remove the candle from the mould.
  • In case the candle gets stuck in the mould, put the entire mould in boiling water for 2-3 minutes and then try to pull it out.


My other Candle Videos -


Making a Designer Tower Candle -


My complete Candle Making Videos Collection -

Wednesday, 2 May 2018

Pot Painting - Shilpkar Work - Tribal Woman Design


Pot Painting and Decoration | Tribal Woman Mural | Using White M-Seal

Hello Guys! Welcome to DIY Crafts For Home Decor. Shilpkar/White M-Seal is a marvelous product for Pot Decoration. This time, I am using it to make a Mural of Tribal Woman. I have given the pot a dark background because I wanted the mural to get enhanced. I have used acrylic gold for jewelry. You can use screwdrivers and needles for detailing. Materials Used - - Terracotta Pot - Acrylic Paints - Nail Paints (Nail Enamel) - Enamel Paints - Brushes - Shilpkar (White M-Seal)/(Any air drying clay) - Sculpting tools/ Needle - A tub full of warm water.
Learn the basics of Pot Decoration using Shilpkar (Preparing M-Seal) - https://www.youtube.com/watch?v=TDArc... Learn the Procedure of Water Painting on Pot using Nail Paints - https://www.youtube.com/watch?v=WCirw... - https://www.youtube.com/watch?v=SF9Oz... My Other Pot Painting Videos - - https://www.youtube.com/watch?v=SF9Oz... My Candle Making Videos - - https://www.youtube.com/watch?v=EMj-x... Don't Forget to Like and Share my Videos. If you are new to my channel, do Subscribe as I make videos on Craft Ideas, Painting Techniques and many more.

Sunday, 28 May 2017

Marble Painting on Glass Bowls

Swirl Painting on Glassware

Transform boring looking ordinary glassware into stunning swirly painted artworks.


Making A Swan Pot using White M-Seal

Making a Swan Pot

Swirl Painting on Pot - Abstract Designs

Marble Painting on Pot

Materials


  • A White painted pot.
  • Nail polish/any Enamel paints. (your favorite colors)
  • A Tub full of water.
  • Tape (Optional)
  • Metallic paint (your favorite color)
  • Brushes.

Instructions

  1. Pour the nail paints on the surface of water in the tub.
  2. Blow over the surface to create stunning patterns.
  3. Roll the pot on the surface to transfer the design onto the pot.
  4. Let it dry
  5. Finish the project with metallic paints.


Procedure (Video)


Monday, 11 July 2016

Growing Lotus in Apartments or in Containers


Growing Lotus Plant in Containers at Apartments
Most on the population in various countries lives in apartments. Which means having your dream garden is difficult. But not anymore!!! I bring in front of you the steps of having a small pond in your apartment Balcony/Porch. Yes! You read it right. All you need are – -

  •          Lotus Seeds (available at Ebay.com, Amazon, aliexpress.com .etc)

·         A big Tub (20-24 inches in diameter and 12 – 15 in height)
·         Black/Red/Clayey soil
·         Small Bowl (10-15 inches in diameter and 2-3 inches in height). (SHOULD BE CIRCULAR BOWL)
·         Sand
·         Manure/Vermi-compost/rose mix/Fertilizer Tabs/Liquid fertiliser.
·         Gravel/Pebbles (Optional).
Introduction to Lotus Plant
The lotus is a beautiful water plant with round bluish green leaves held well above the water. They vary in size from the miniature Chinese noodle bowl lotus, which has flowers the size of a watch face, to huge standard size plants which can stand 6-7 feet above the water surface. The flowers open mid-morning and close mid-afternoon. Each flower lasts three days before the petals fall away revealing a distinctive seed pod. The pods continue to grow another 6 weeks until double in size. Flower colours are combinations of white, pink, red and yellow. Newly planted lotus will not always flower the first year. The chances of flowering are better if the early summer season is very warm and sunny. Lotus grows in zones 4-10. Most hybrids are developed from species native to East India.

Phase 1: Germinating Lotus Seeds                

Image result for germinating lotus seedsGerminating lotus seeds can be a tricky job. Lotus seed is covered with hard coating which will NOT let water pass into it. (In nature the seed takes 100 years or so to sprout). To speed up the process, we need to remove a small bit of that outer coat to let water pass into the embryo. To do that, I used a sharp knife. Cut off a small bit of outer (dark brown) coat to reveal some cream colour cotyledon (Don’t do that too much, you may hurt the seed). After doing so, put the seeds in a container of water and wait. Change the water once every day. After 3 days, your seeds will swell up almost 2 times. And after 2 more days, you can find that the seeds will split and green shoots will be emerging. And, for 2-3 weeks, place them in different long jars. They will grow really fast.

Phase 2: Potting


After 1 month or so, the plant is ready to be planted in its pot. Fill the smaller bowl half with clayey/Black soil and press it hard. Make a hole in the middle and plant the seed in it. Spread some manure/rose mix around the seed and cover the entire pot with thick layer of sand. Place some stones/pebbles for good look and place it in the bigger tub. Fill the tub with water. Make sure that the temperature outside DO NOT drop below, 15 degree Celsius before planting them outside. Lotus love heat and sunshine. So, place them in a sunny and hot spot. Place them at a place in your porch where they will get at least 4-5 hours of direst sunshine. (More sunshine – better growth).


Phase 3: Maintenance
The first spring leaves to appear will float on the water surface. Active growth begins when water temperature reaches 35 degree Celsius. After some 4-5 months of hot sunshine, probably the lotus will begin to send up leaves which will stand above the water surface.
In the winter you can store you lotus in an unheated garage, a greenhouse or drop it to the deepest part of your pond (the tuber cannot be allowed to freeze). After the last frost the next spring, the lotus should be lifted from the pond or moved from the garage and placed in a sunny, warm & protected location to begin its seasonal growth. When the plant has developed its aerial leaves & the pond again reaches 70 degrees, you can return the lotus to the pond.
(If the temperatures at your area do not go below 15 degrees Celsius at night times, you need not let your lotus go for dormant stage.)
Feeding is not necessary for 3-4 months after the planting. As soon as lotus starts sending aerial leaves, use fertilizer tabs very carefully. (As too much fertilizer might burn the plant).

Now just wait for a beautiful Bloom!!!


After 3 Months - 


How to make Trees for Dioramas | Artificial Trees for Architectural Mode...

Hello Craftopedians! Wire Trees Wire Trees made of Wool As the Title suggests, this is an Architecture Student Hack video...