Wednesday, 4 July 2018

Growing Mango Tree from Seed | Update 3 | Week 3

Hello People, Welcome to DIY Craftopedia!

Back to the 3rd update on my Mango Sapling. The days are becoming really hot. It is slightly sunny and humid. The plant seems to love it! The leaves have turned saturated green. New leaves are coming up. Here are the pics taken on 04-07-18.


You can see the new upcoming leaves here -

Monday, 2 July 2018

Make a Stunning Vase with Plaster of Paris and an Old Piece of Cloth


Truly, Plaster of Paris is a wonder material. Let's see what exactly it is -

Plaster is a building material used for the protective and/or decorative coating of walls and ceilings and for moulding and casting decorative elements. In English "plaster" usually means a material used for the interiors of buildings, while "render" commonly refers to external applications. Another imprecise term used for the material is stucco, which is also often used for plaster work that is worked in some way to produce relief decoration, rather than flat surfaces.
The most common types of plaster mainly contain either gypsum, lime, or cement, but all work in a similar way. The plaster is manufactured as a dry powder and is mixed with water to form a stiff but workable paste immediately before it is applied to the surface. The reaction with water liberates heat through crystallization and the hydrated plaster then hardens.
Plaster can be relatively easily worked with metal tools or even sandpaper, and can be moulded, either on site or to make pre-formed sections in advance, which are put in place with adhesive. Plaster is not a strong material; it is suitable for finishing, rather than load-bearing, and when thickly applied for decoration may require a hidden supporting framework, usually in metal.
Gypsum plaster, or plaster of Paris, is produced by heating gypsum to about 300 °F (150 °C).
CaSO4·2H2O + heat  CaSO4·0.5H2O + 1.5H2O


Procedure - 

  1. Mix Plaster Powder with water until you get a thick liquid consistency.
  2. Take a square shaped cloth (Of any material, my favorite choice is jute rag as it gives fantastic texture)
  3. Dip the cloth in plaster and completely soak it with the mixture.
  4. Take a tumbler/bottle and cover it with a plastic sheet.
  5. Invert it and put the cloth on it as shown - 
    

      6. Let it dry for 24 hrs 
      7. Remove the hardened vase and paint it with Acrylic/Enamel paints.


Wednesday, 27 June 2018

Growing Mango Tree from Seed in a Pot | Week 2 | Update 2

Hello People, Welcome to DIY Craftopedia

This is the 2nd update of my Mango Sapling. Nowadays its not so sunny here. Today was really cloudy but the heat persisted. The present atmospheric conditions here are: Temperature - 26 degree Celsius and 83% humidity. It is expected to rain in some parts of Hyderabad. I do wish it rains. Rain water has magical effects on new born saplings! It's true. I have tested it out that transplanted plants and newly sprouted plants love rain water.

Coming back to my Mango Sapling, It unfurled 3 new leaves which are still reddish brown. The size of one leaf is really good. The others are yet to increase. The remaining old leaves have turned really thick with highly saturated green color. I'm still continuing the water used for washing vegetable peels and food grains to water the plant. Otherwise, no extra fertilizer is used. Every morning, I place the plant in direct Sunlight (Whichever day, sunlight is available!).

Here are the pictures of my Mango Plant taken on 27-06-2018 (Wednesday)


A new bud is growing. Maybe it will produce more branches. Let's wait. To stay updated about my first Mango plant growing experience, follow my blog.

Tuesday, 26 June 2018

How to Make a Layered Gel Wax Candle | Designer Gel Candle Making Tutorial

Hello people. WELCOME to DIY Craftopedia

My last post on Gel wax fetched a lot of popularity by you folks. Hence, I decided that another Gel Candle idea would be appreciated by you. This one is really special and slightly tricky. Gel Wax is jelly. It bends like a thick sponge cloth. Hence, it is perfect for this idea. Materials required -
- Gel Wax (You can buy at amazon - https://amzn.to/2HUsftN ) - Gel Wax colours (You can buy at amazon - https://amzn.to/2t1vjzU ) - Candle Wick - Double Boiler setup - A clean plate or tray - Spoon/Spatula - Big Needle/Thin stick
- Cutter/Knife - Scissors.

Procedure - 
  1. Melt some gel wax in a double boiler.
  2. Add your favorite colour to it.
  3. Carefully, pour the molten gel wax in a plate/tray upto 1/4th inch thickness.
  4. Keep it away to cool down. Meanwhile repeat the procedure with another colour.
  5. After the layer of gel wax cools down, cut strips of almost 3cm thickness.
  6. Take two strips of different colors and put them end-to-end on each other at 90 degree angle as shown - 
  7. Lift the bottom strip and fold it along the edge of the top strip towards the opposite side. Repeat the process throughout the strip as shown -
  8. Once the entire two strips are folded like that, Pierce a small hole through the candle from top to bottom.
  9. Attach the wick to the needle and use it to send through the candle.
  10. Cut-off any extra wick at the top. Your Designer Gel wax candle is done!


Procedural Video - 


(The above amazon links are affiliate. When you use them, I receive a small commission for no extra cost to you)

Saturday, 23 June 2018

Make a Textured Bowl for your Table Top with Plaster of Paris


Making a Plaster of Paris Bowl

Hello Guys, Welcome to DIY Craftopedia!
This is the first time I'm working with Plaster of Paris. It was fun and most importantly, It was economical. The kind of products which we can make with POP is a lot costlier in the shop than the POP packet itself. I have made a Wood Textured Bowl with it.

Materials needed -
- POP (Gypsum Powder) - Two bowls of the same shape but different size - Any old container to mix POP - Crushed plastic sheet. - Water - Spoon to mix. - Newspaper and gloves.

Procedure -

  • Mix POP powder and water appropriately until you get a thick consistency.
  • Cover the inner surface of bigger bowl with plastic sheet;
  • Pour the mixture into the big bowl.
  • Press the smaller bowl into the POP mixture.
  • Put some heavy stones in the smaller bowl to hold it in place.
  • Leave it to dry overnight.
  • Remove the smaller bowl and slowly remove the plastic sheet as well.
  • Paint the bowl with acrylic/enamel paints.


Procedural Video - 

Wednesday, 20 June 2018

Growing Mango Tree from Seed in a Pot | Update 1

Hello People, Welcome back to DIY Craftopedia.

It's almost 1 week since my last (and the first) Mango plant post. The plant is nearly 3 weeks old. Its growing really healthy. The days are still sunny. The plant is receiving early morning direct sun rays and indirect rays throughout the day. The major update is that the leaves have turned Green completely today(21-06-2018). New major shoots are coming. The overall plant growth is commendable. I'm not yet giving any fertilizers. Almost every day, I use the water used for washing rice grains to water the plant. This technique was proved effective by me for many other plants and I think this is the reason for its healthy look. I would recommend you, not to use any chemical fertilizers as they might burn the sapling. Use the water used for washing food grains and vegetables/fruits to water the plant on regular basis.

Here are the pictures of my Mango plant taken on 21-06-2018


Here you can see the new shoots coming - 


This is the first update of my Mango Plant Growth done on 21-06-2018. Stay tuned for real-time update of its growth every week.


Sunday, 17 June 2018

Crystal Gel Wax Candle | Easy No Heat Required Candle Making


Hello people, Welcome to DIY Craftopedia. Candle making was always one of my favorite Craft Works. Hence, trying out new methods is always exciting. This time, I'm making a Gel Wax Candle.
Melting wax is a difficult job. Especially if you don't have a double boiler.
This chore makes candle making unpopular craft. But, not anymore. This technique is very simple as you won't require any heat.


A small intro about Gel Wax -

Gel wax is a mixture of polymer and mineral oils. As, the name suggests - it is squishy and jelly. Usually, you get transparent material when you buy it. Colors used for it are sold separately. Here are the links for you to buy them from Amazon -

Asian Hobby Crafts Gel wax (500gm) - https://amzn.to/2t1vjzU

Asian Hobby Crafts Gel Wax colours - https://amzn.to/2HUsftN

Other Materials Required - - Glass Tumbler - Candle Wick - Gloves - A Bowl to mix Gel Wax.

Procedure - 

  1. Cut a few pieces of gel wax and put them in a container.
  2. Put on a pair of gloves and start crushing the gel wax pieces with your hands.
  3. Crush them into almost same size.
  4. Add few drops of your favorite colour to it and mix again.
  5. Take a glass tumbler/container and some crushed gel wax in it. (Add until the height to which you can put the wick.
  6. Hold the wick at the middle of the container and add the remaining gel wax in it.
  7. Ensure that the wick stays at the middle and press down the gel wax.
  8. Add a bit more of colour if required and adjust the wick height. 


Procedural Video - 


The above Amazon links are affiliate. I receive a small commission when you use them with no extra cost to you.

Saturday, 16 June 2018

Learn Pot Painting using M-Seal - Lilac Flower Decoration

Pot Painting using M-Seal - Lilac Flower Decoration


Hello people, welcome back to DIY Craftopedia. I recently looted a terracotta shop (yep...!) and bought a ton of pots for an extremely cheap price. So, this summer, it will be a terracotta fest in my channel.

Materials used-

- Terracotta Pot
- Shilpkar (White M-Seal) - Enamel Paint (Brown) - Hair Dye Brush (for Enamel Paint) - Acrylic paints ( Metallic Pink and Violet colors) - Synthetic Brushes (for Acrylic Paints) - Gloves and Newspaper (to avoid a mess)


Procedural Video -

The finished work - 


Wednesday, 13 June 2018

Growing Mango Tree in a Pot from Seed | Introduction


HELLO PEOPLE! Welcome to DIY Craftopedia. Few weeks ago (almost 15-20 days ago), I planted a mango seed in my Pot. I wasn't expecting much but today, I saw the Sapling which is almost 1 week old. So, I decided to make a real-time blog entry and growth process of it. Starting with a brief introduction about the 'king of fruits' - Mangoes!

Mangifera indica, commonly known as mango, is a species of flowering plant.
It is native to the Indian subcontinent where it is indigenous. Hundreds of cultivated varieties have been introduced to other warm regions of the world. It is a large fruit-tree, capable of a growing to a height and crown width of about 100 feet.
The species domestication is attributed to India around 2000 BC. Mango was brought to East Asia around 400-500 BCE. The species was assessed and first named in botanical nomenclature in 1753. Mango is the national fruit of India, Pakistan and the Philippines.


How did I Plant it?

I did not even knew at the time of planting that the seed must be broken open to reveal the actual seed for faster germination. So probably, it took longer time for my plant's germination. But still it happened. Let me give a brief account of the atmosphere here at Hyderabad, India.
It's June, so its still hot but we have received a lot of pre-monsoon showers. The Temperature here is more than 30 degrees Celsius during daytime and 25 degrees Celsius by midnight. Humidity is around 50% - 60%. And, its really sunny most of the time.


Here are pictures of my plant on 14th June 2018


The Mango Sapling presently has 6 healthy leaves. And 3 upcoming leaves. I will keep posting updates every now and then. 

Tuesday, 12 June 2018

Learn to use Soft Pastels - Basic Techniques on Soft Pastel Works - The Lonely Bird

About Pastels - 
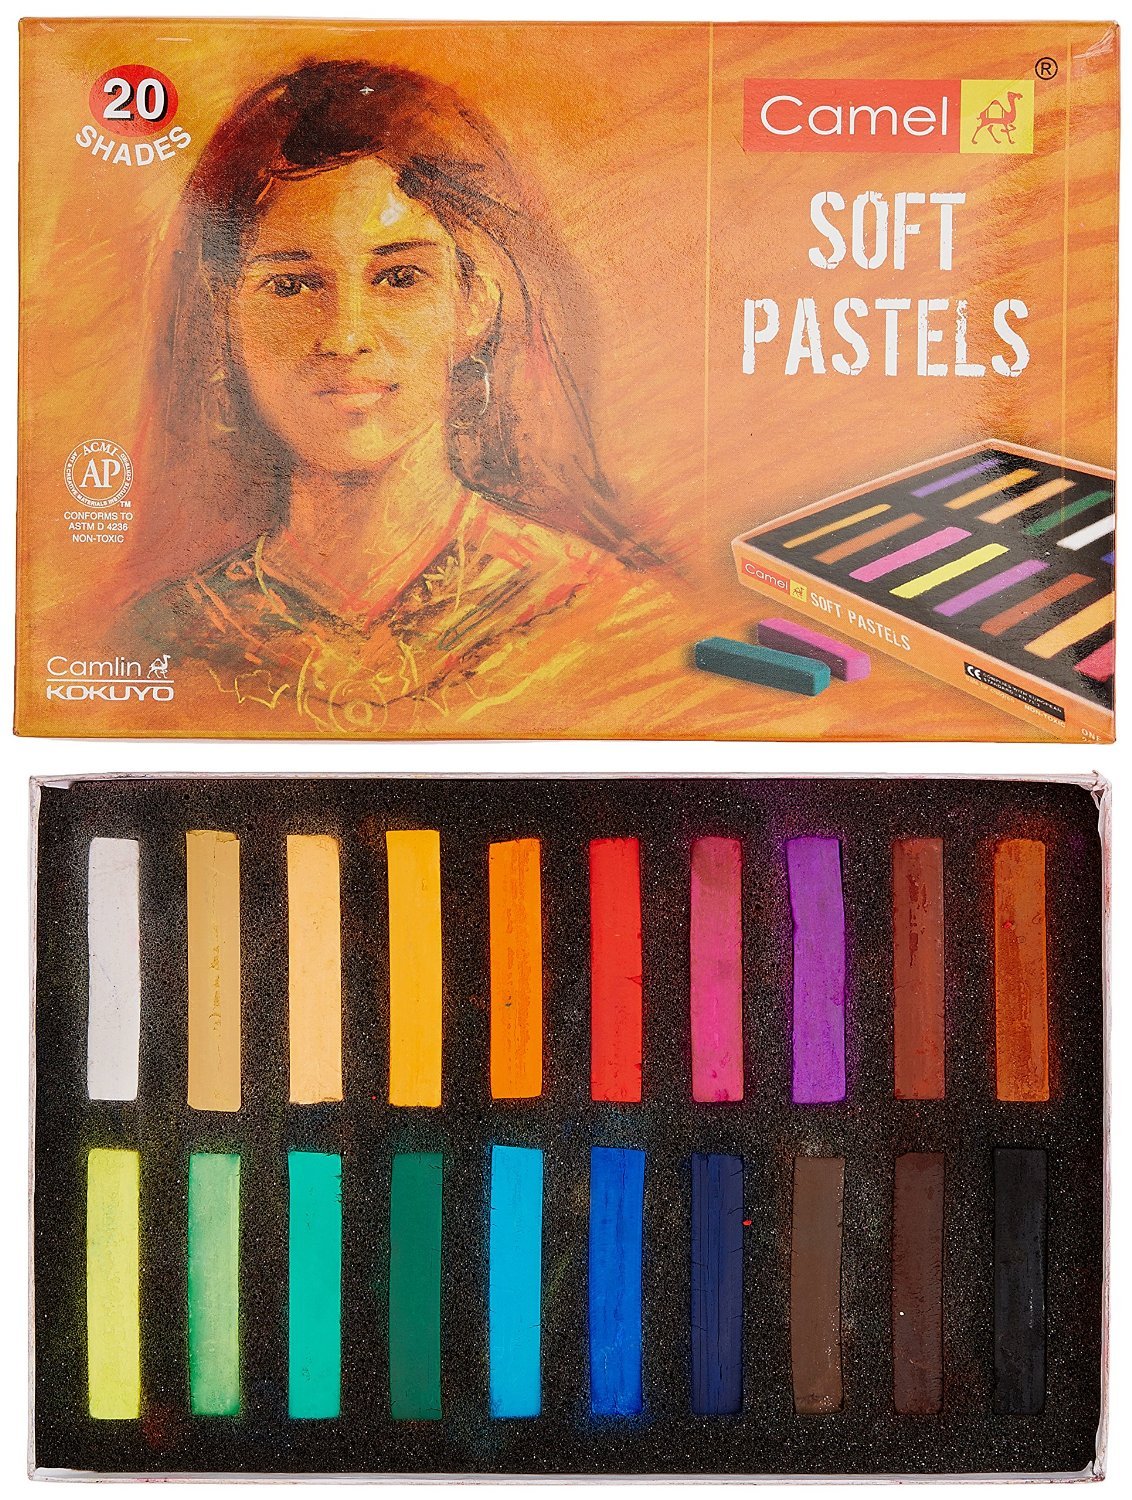
Pastel sticks or crayons consist of pure powdered pigment combined with a binder. The exact composition and characteristics of an individual pastel stick depends on the type of pastel and the type and amount of binder used. It also varies by individual manufacturer.
Image result for soft pastels.

Dry pastel media can be subdivided as follows:


  • Soft pastels: This is the most widely used form of pastel. The sticks have a higher portion of pigment and less binder, resulting in brighter colors. The drawing can be readily smudged and blended, but it results in a higher proportion of dust. Finished drawings made with soft pastels require protecting, either framing under glass or spraying with a fixative to prevent smudging; hairspray also works, although caution should be taken, as fixatives may affect the color or texture of the drawing. White chalk may be used as a filler in producing pale and bright hues with greater luminosity.


  • Pan pastels: These are formulated with a minimum of binder in flat compacts and applied with special Soft micro pore sponge tools. No liquid is involved. A 21st-century invention, pan pastels can be used for the entire painting or in combination with soft and hard sticks.


  • Hard pastels: These have a higher portion of binder and less pigment, producing a sharp drawing material that is useful for fine details. These can be used with other pastels for drawing outlines and adding accents. 

Hard pastels are traditionally used to create the preliminary sketching out of a composition. However, the colors are less brilliant and are available in a restricted range in contrast to soft pastels.


  • Pastel pencils: These are pencils with a pastel lead. They are useful for adding fine details.

In addition, pastels using a different approach to manufacture have been developed:


  • Oil pastels: These have a soft, buttery consistency and intense colors. They are dense and fill the grain of paper and are slightly more difficult to blend than soft pastels, but do not require a fixative. They may be spread across the work surface by thinning with turpentine.


Materials required -

  • Soft pastels
  • Drawing sheet
  • Soft Clean Cloth (for smudging)
  • Small sheet of paper (for hand rest)
  • Pencils
  • Earbuds (for detailing)

Procedural Video -

(image source: google.co.in)

Saturday, 9 June 2018

Make a Cool Gemstone Candle for Yourself - Follow these Simple Steps!


Welcome back to DIY CRAFTOPEDIA - Crafts For Home Decor!


Another candle making video is ready (this happens to be my personal favorite.) A Gemstone effect Candle.


The uniqueness of this idea is that the entire candle has an abstract ragged look. I have chosen the shades of blue and indigo for this candle. 

Materials Needed -

- Wax - Mould - Wick - Crayons - Double Boiler (or any two vessels) - Ice-cube tray - Knife/Cutter
Procedure -
  • Melt Wax in a Double boiler.
  • Add your favorite color to it. (Just put a few pieces of crayon in it)
  • Pour the molten wax in Ice-cube trays.
  • Leave them for few hours to solidify.
  • Remove the blocks of wax from the tray and cut them into 1/2 inch (or less) size pieces.
  • Prepare the mould by attaching the wick.
  • Fill the mould with these pieces.
  • Melt some more wax (without any colour)
  • Pour the molten wax in the mould (filling the gaps and crevices between the wax pieces).
  • Leave it overnight to solidify.
  • Pull out the candle from the mould. (If it gets stuck, Submerge the candle in Boiling water for 2-3 minutes and then try to pull it).
Here is the Procedural Video -


My other Candle Videos - The Best (and safe) Wax Melting Technique - https://www.youtube.com/watch?v=OmHFf... Making a Designer Tower Candle - https://www.youtube.com/watch?v=TTXtW... My complete Candle Making Videos Collection - https://www.youtube.com/watch?v=EMj-x...

How to make Trees for Dioramas | Artificial Trees for Architectural Mode...

Hello Craftopedians! Wire Trees Wire Trees made of Wool As the Title suggests, this is an Architecture Student Hack video...